How to Create Abstract Photos with Fruit and Veggies
They feature in renaissance paintings, fine art photography and advertisements for your local supermarket. It’s your everyday fruit and veggies! Not only do they keep you full, fruits and vegetables have some remarkable detail, making for great photographic subjects.
As demonstrated by masters like Edward Weston, produce and photography work really well together. The matter that makes up organic material has a natural and sometimes surprising ingenuity. That’s why, with very little prep time, creating abstract photos with fruit and vegetables is a such a simple and fun project with surprisingly beautiful results.
Supplies you will need include:
- Camera
- Tripod
- A selection of fruits and veggies
- Hand towel or wipes (to remove any juice off of your hands)
Gathering your produce
So what fruit and veggies should you use? The answer is, any and all of them! One of the best things about abstract photography is the variety of subject matter available. Check your fridge, your fruit bowl, and failing that, check out your local grocer. All varieties of fruit and vegetables have their own artistic properties, let alone every individual piece. If you stick with produce, you’ll never be short on subject matter for abstract photos.
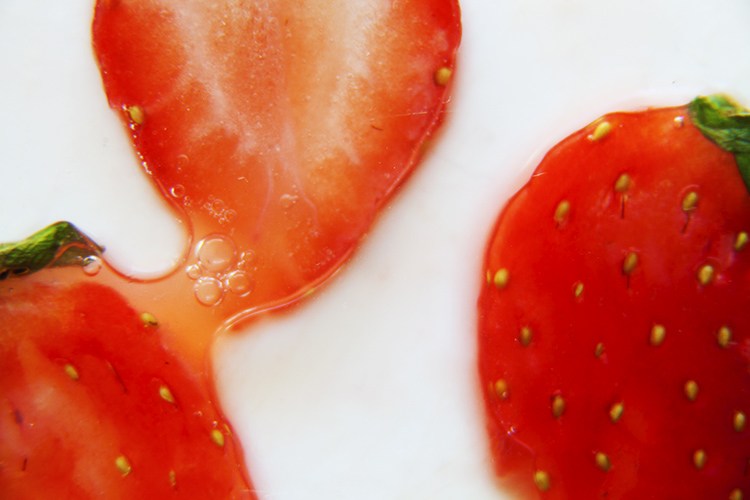
Personally, I enjoy focusing on the textures and layers that make up organic material. That’s why I often concentrate on photographing vegetables like leeks and onions. The intricate swirls you can see when you cut an onion in half are as unique as a thumbprint, so you will never photograph the same thing twice. Fruits like strawberries and oranges that have a very distinct pattern are great for incorporating leading lines and pattern into your photography.
Opposite on the spectrum in terms of texture and softness, the curving lines in an onion peel and the texture of a rock melon’s skin are beautiful and intriguing at the same time. Just grab whatever catches your eye. If you decide you don’t want to photograph a fruit or vegetable later, just eat it instead!
Once you’ve selected a nice range of fruit and vegetables, it helps to pre-cut a few slices so they will be ready to photograph. Cut nice thin slices, making as level cuts as possible so they will sit square with the camera lens. Don’t cut all your fruit and vegetables up at once though, as they will brown when exposed to the air for too long.
Setting up
If you have your fruit and camera at the ready, you’re halfway there. To truly capture the detail in your fruit and veggies I recommend using a macro lens or extension tubes. For these images, I used my set of Kenko extension tubes with my EF 24-105mm Canon f/4 lens. Set up your tripod and camera near a good light source to illuminate your subjects. A window with natural light coming through should be plenty. Lay out your fruit on a plain, flat surface and arrange them how you like.
Start by focusing your camera on areas that appeal to you the most. The texture or the pattern on a potato might catch your eye, or you might want to focus on the delicate gradients of color in a peach. You’ll find that the more you investigate your produce, the more you’ll have to photograph. Training your eye to recognize these subtle intricacies will prove invaluable in developing your inner photographer’s compass.
One you begin to investigate the visual qualities of fruits and veggies, you’ll never look at the grocery store quite the same. And that’s great! Photography is about opening yourself up to new visual experiences. The more you explore, the more you’ll want to see. That’s what makes us photographers tick.


